Wednesday, April 30, 2014

Tupperware for Little Ones

Tupperware is a brand known for quality plastic storage containers backed by a lifetime warranty. I was pleasantly surprised when I saw that they recently added Twinkle Tup to their product range. This new product range includes training cups, snack cups, easy grip bowls, straw tumblers, cutlery and feeding bowls for children 6 to 18 months old.

Twinkle Tup is made of BPA-free food grade materials, child safe (i.e. no sharp edges, spill-proof, durable), dishwasher safe and backed by a lifetime warranty (except for straw and straw brush).

For children 6 to 18 months old, they have the Twinkle Totz Set, which comes with  Twinkle Snack Cup (1), Twinkle Training Cup (2) and Twinkle Easy Grip Bowl and Hang-On Spoon. The items can be bought separately.


For kids 18 to 36 months old, they have the Twinkle Kidz Set, which comes with the Twinkle Straw Tumbler (4), Twinkle Feeding Bowl (5), Straw Brush (6), Twinkle Cutlery Set with Casing (8).


We tried out the Twinkle Kidz Set for kids 18 to 36 months old.


It comes with a 350ml Twinkle Straw Tumbler, a 430ml Twinkle Feeding Bowl and a Twinkle Cutlery Set (ergonomically designed fork and spoon that fits nicely in a storage box). This makes packing food for the little one so much easier. The storage container has enough room for a portion of his lunch/dinner, and the cutlery is kept clean in its storage box. When he's done with his meal, I can keep the used cutlery back into the storage box to bring home for washing.

I am giving away a Twinkle Kidz Set worth $35. Follow the instructions below to win a set for someone you love!

Disclaimer: I was provided a Twinkle Kidz Set for purposes of this review. No monetary compensation was received.

a Rafflecopter giveaway

Monday, April 28, 2014

Kidzania Singapore

As you might have already heard, Kidzania is coming to Singapore in 2015! Kidzania is an indoor theme park like no other. It is an entertainment and education centre for children 4 to 14 years old.  It offers interactive learning experiences through role-playing set in a kid-sized city. As in the real world, kids choose activities such as being a police man, doctor, journalist, fire fighter or supreme court judge (from a long list of available professions), earning Kidzos (the Kidzania currency) for the work that they do. They even have the option to spend Kidzos upgrading themselves at the 'local' university, thereby opening doors to more career options.

Source: www.kidzania.com.sg

The industry partners for Kidzania Singapore include Killiney Kopitiam, KFC, The Learning Lab, Maybank, Pizza Hut, Yakult and WTS Travel, amongst several others.

I hope they'll inject some local flavour to Kidzania Singapore... like have a Kopitiam where kids get to flip pratas, make rojak and brew teh tarik... and have a construction site where construction workers work together to build HDB high-rise flats... and offer a city tour onboard an amphibious vehicle like in our popular Singapore Duck Tours. Judging from the list of industry partners, I'm guessing that kids will also get to bottle their own Yakult, make pizzas, and serve as KFC crew.

Other than working, kids can also choose to undertake undergraduate or graduate studies as The Learning Lab University. Modelled after great real-world universities like Oxford and Cambridge, The Learning Lab University will be the nurturing ground of a new generation of passionate, energetic and inspired learners. Kids can pick the professions they prefer: Cardiovascular surgeon, millionaire private equity investor, Supreme Court judge, and undertake studies to attain the requisite qualifications. The University is envisioned as an experiential facility, where kids have fun while learning collaboratively in a technology-enabled learning environment. Students 'graduate' with qualifications which allow them to earn more kidzos, opening the doors to better job prospects.

My boys and I had a blast at Kidzania Bangkok and we can't wait to visit Kidzania Singapore!

Wednesday, April 23, 2014

Chugga Chugga Choo Choo!

We made a cardboard train over the weekend. Everything was made out of paper and held together by glue or masking tape.

The 'skeleton' was made of two cardboard boxes. One of them is the Huggies box you see in the picture below, and another one was a box that was used to hold reams of A4 paper. I cut the 'body' of the train out of mounting boards that I had leftover from a previous project. The boys proceeded to colour the body using crayons. 


The wheels were made out of paper plates.


Trying out the partially assembled train... The box is big enough to fit my 3 year old son.


We made the funnel out of a toilet paper roll and a party hat. I turned the party hat the wrong way around, and coloured it the way we liked.


We went on to colour in headlights and a front 'bumper', and got another good sized box for the passenger cabin behind. And there! Our cardboard train!


For another cardboard project, check out our Lightning McQueen inspired cardboard car!


Linking up with...

Mama to 5 Blessings

Monday, April 21, 2014

Teaching Simple Addition

I hold engineering degrees and am able to solve complex mathematical equations. But when it came to teaching my almost 4 year old son to do simple addition, I was stumped. It is something that I knew how to do, and could do it in an instant, but how do I teach my child the concept of addition and impart the skill of doing simple mental sums to him? After some trial and error, I've figured it out. If teaching 1+2 has stumped you, the following might be useful.

1. Rote counting
Most children are able to rote count when they are about 2 years old. Singing songs like 12345 Once I caught a fish alive and Counting Bananas helps them to learn rote counting.

Rote counting backwards (i.e. from 10 to 1) will come in useful for subtraction, but not necessary at this time. 

2. Recognising numbers and using manipulatives to represent numbers.
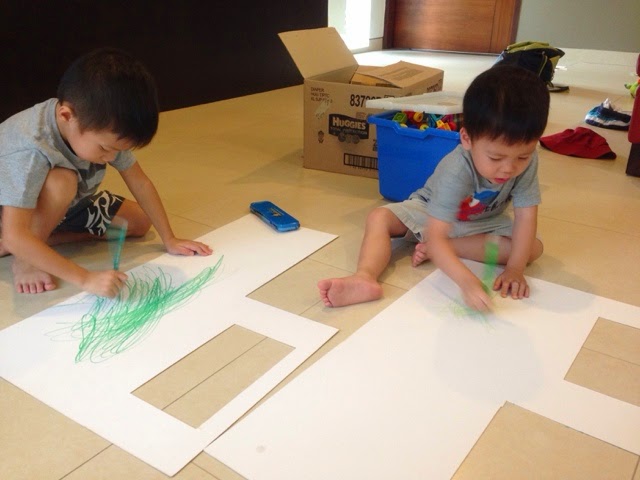
My boys love working with manipulatives. I like how they think they are 'playing' but I am actually fulfilling my lesson objectives for the day. For counting, we use our bear counters. Lego bricks or bread tags work as well. I lay out numbers and get them to lay out the correct number of bears. Then I introduce 'more than' and 'less than' as well. 


This things about boys... they like lining the bears up in neat rows and pretending that the bears are soldiers in an army parade.

3. Use fingers to represent numbers.
Other than using manipulatives, children should be comfortable holding out the correct number of fingers to represent any number within 10. I find Nathan struggling with this initially, but as he 'practises' more, he was able to hold out the correct number of fingers in an instant.

4. Which is bigger?
Being able to identify the bigger number will help them to add quickly, especially when they are first starting out. There is a dizzying array of pre-school math books available in the bookshops, but they might not contain enough of certain type of exercises that I'd like my kids to work on. As such, I just buy one or two math assessment books and plug the gaps by writing out the ones that I would like more work on.


These are two pre-school math books that we have / are using. They are not necessarily the best around (since I haven't tried all of them), but I chose these two based on layout and breath of topics covered.


Having covered the "basics" above, one should have the skills required to do simple addition.

Method 1: Counting on
When faced with a sum like 8 + 3, we first identify the larger number. In this case, Nathan will determine that 8 is the larger number, and actually say out loud, "8 in my head", then he'd hold out 3 fingers, and count up from 8 as he folds down each finger one at a time... "9, 10, 11". 11 is the correct answer. When he first started out, he tended to start counting from 1 all the time... so he'd go... "8 in my head... 1, 2, 3, 4, 5, 6, 7, 8..." and then proceed to count up. With more practise, he's now able to start counting from any number without starting from 1 all the time.

Method 2: Number line
The number line method is more visual. Kids start from 8 and draw arcs jumping from 8 to 9 to 10 to 11. Nathan is not quite able to visualise the arcs without actually drawing them out. So this means that he actually has to redraw the line each time he has a new sum, which is rather time consuming. Anyhow, the number line is useful for more complex sums, so it is good to know how to use it.


I had a look thru Singapore's Primary 1 Math syllabus, and also flipped thru two popular Primary 1 math assessment books. Much of what is done in the first six months (in Primary 1) requires a child to be able to add well. So it is important to get the basics right at pre-school.

Find opportunities for the child to use his skills in a meaningful way... When making lunch, I'd get Nathan to find out many slices of pizza each person in the family wants, then work his sums and tell me the total so have enough for everyone. Some restaurants have ordering chits at the table, so we write our orders down instead of having a waiter take down our orders. Most of the time, it involves writing the item code and quantity. I'll let Nathan take the orders. He's delighted that he's able to help, and it motivates him to improve. 


Linking up with...

new button

Tuesday, April 8, 2014

Pizzas that your kids can make!

I am a stay home mom, and my 'duties' include chauffeuring the kids around, preparing lunch, washing the dishes, putting the dirty laundry in the washing machine, preparing material for home-learning, supervising homework, arbitrating fights, keeping the house (relatively) clean... 

I have a little over two hours of 'me time' every weekday morning when they are in school. Besides trying to complete some of the things listed above, I fit in a BSF meeting (once a week) and gym sessions (once/twice a week).

As such, the lunches I prepare are usually one pot wonders. Meals must be fast to cook with minimal washing thereafter. Recently, I found something even better than one pot wonders... I outsourced the job of preparing lunch to my kids!

Ingredients for simple pizza base

Ingredients
For pizza base
A loaf of bread
Tomato paste
Mozzarella cheese

For pizza toppings
Sausages
Ham
Pineapple
Minced meat
Capsicum
* Pick as many of the above as you like or replace with something that your kids like to eat

Directions
Before beginning, pre-heat oven to 190 degree Celsius.
1) Lay pieces of bread on a baking tray and spread a thin layer of tomato paste
2) Sprinkle a generous amount of Mozerella cheese on each slice of bread.
3) Top with your favorite ingredients.
4) Pop in the oven for 5 minutes.
5) Fill your tummies :)

Chefs hard at work

Other than cutting up the sausages into thin slices, the boys did everything else. They loved making their own lunch and eating it!

Yummy!

Do you have any simple recipes to share?

Linking up with...

Thursday, April 3, 2014

Eat Your Vegetables!

I never really liked vegetables. As a child, my dad gave me extra portions of fruits to make up for the vegetables that I didn't eat. I'm not sure if the extra fruits actually gave me the vitamins that the vegetables would've given me, but I suppose eating more fruits didn't do me any harm, though I can't say the same for not eating vegetables. :P

Yakult Heath Foods has recently hit the shores of Singapore. I had the opportunity to try one of the products - the Maroyaka Kale. Maroyaka Kale is a rich and tasty green juice made of premium kale. Kale is a cruciferous vegetable which is considered an original species of cabbage and broccoli. It contains beta-carotene and is high in calcium, and is recommended to those who are concerned about their low vegetable consumption.


It is grown in Japan, harvested and transferred to Yakult Health Foods factory to be processed. The kale is cultivated without the use of chemical fertilisers or pesticides, and the final product contains no artificial colouring, flavouring or preservatives.

A box of Maroyaka Kale contains 30 sachets of Maroyaka Kale powder. Each serving individually packed for convenience. The powder is water-soluble and dissolves easily in cold water or cold milk.

Each sachet contains a single serving

I dissolved a packet in 100ml of cold milk, as recommended. The resulting drink is rather bitter, and it tastes a bit like green tea. And honestly, I much prefer drinking this than eating vegetables. I'm glad that there's now an alternative way of taking my vegetables.

Dissolve sachet in cold beverage

Dissolves easily in cold milk


In addition to Maroyaka Kale, Yakult Health Foods also carries other health supplements like glucosamine, collage, royal jelly and multi vitamins. The complete range of Yakult Health Foods are available at Guardian Pharmacy outlets with prices starting from $43.90 to $119.90. 

If you don't like eating vegetables, try drinking them instead!


Disclaimer: We were invited to the product launch by AT Marketing Consultancy and were provided with a month's supply of Maroyaka Kale for purposes of this review. All opinions are my own.